
How to upload Documents from the Client Portal
Uploading the right documents early helps your legal team verify facts, meet deadlines, and keep your Workflow moving without delays. This guide shows you how to find your Document Checklist, upload files, handle rejections, and submit everything for review.
Who this is for: Clients uploading documents through the Glade client portal.
Before you start
Collect the files you plan to upload.
Check file types: PDF, JPEG, and PNG are accepted. Microsoft Word/Excel files (e.g., .doc, .docx, .xls, .xlsx) are not accepted.
For PDFs, ensure they’re not password‑protected.
Option A: Start from your Home (To‑do list)
Log in to your Glade client portal.
On Home, locate your To‑do list and click Upload Documents.
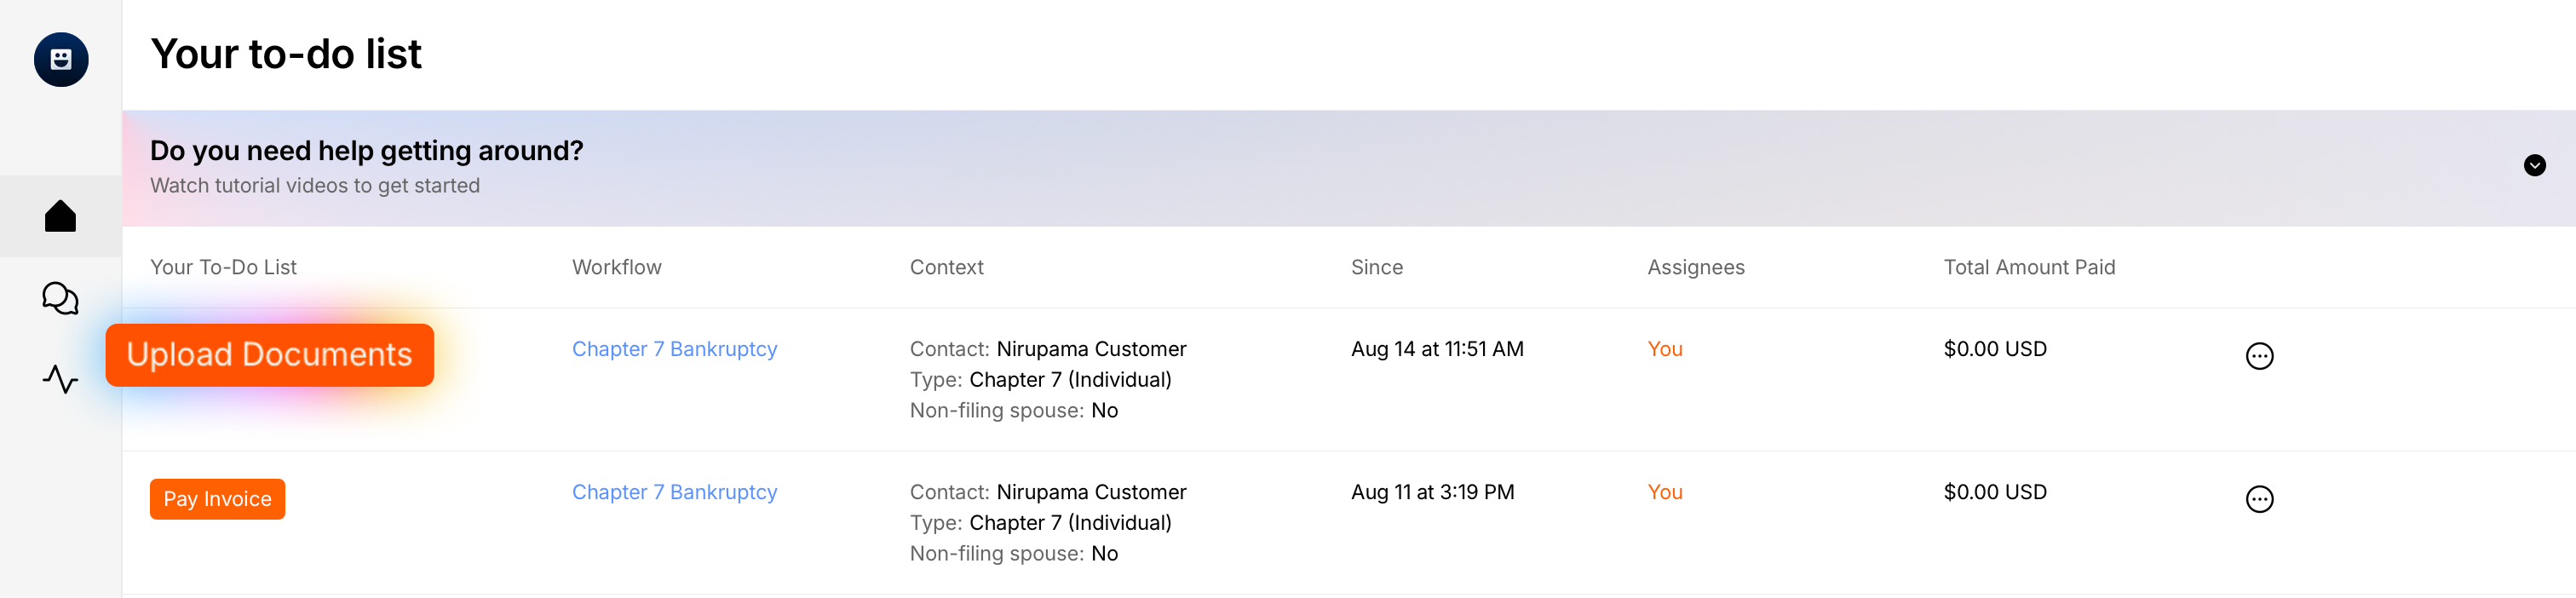
Don’t see “Upload Documents”? Use Option B (Activity → Workflow) below.
Option B: From Activity → Workflow
In the left navigation, click Activity.
Open your Workflow.
Find the task labeled Document Checklist, then click View.
[screenshot: Document Checklist task — View]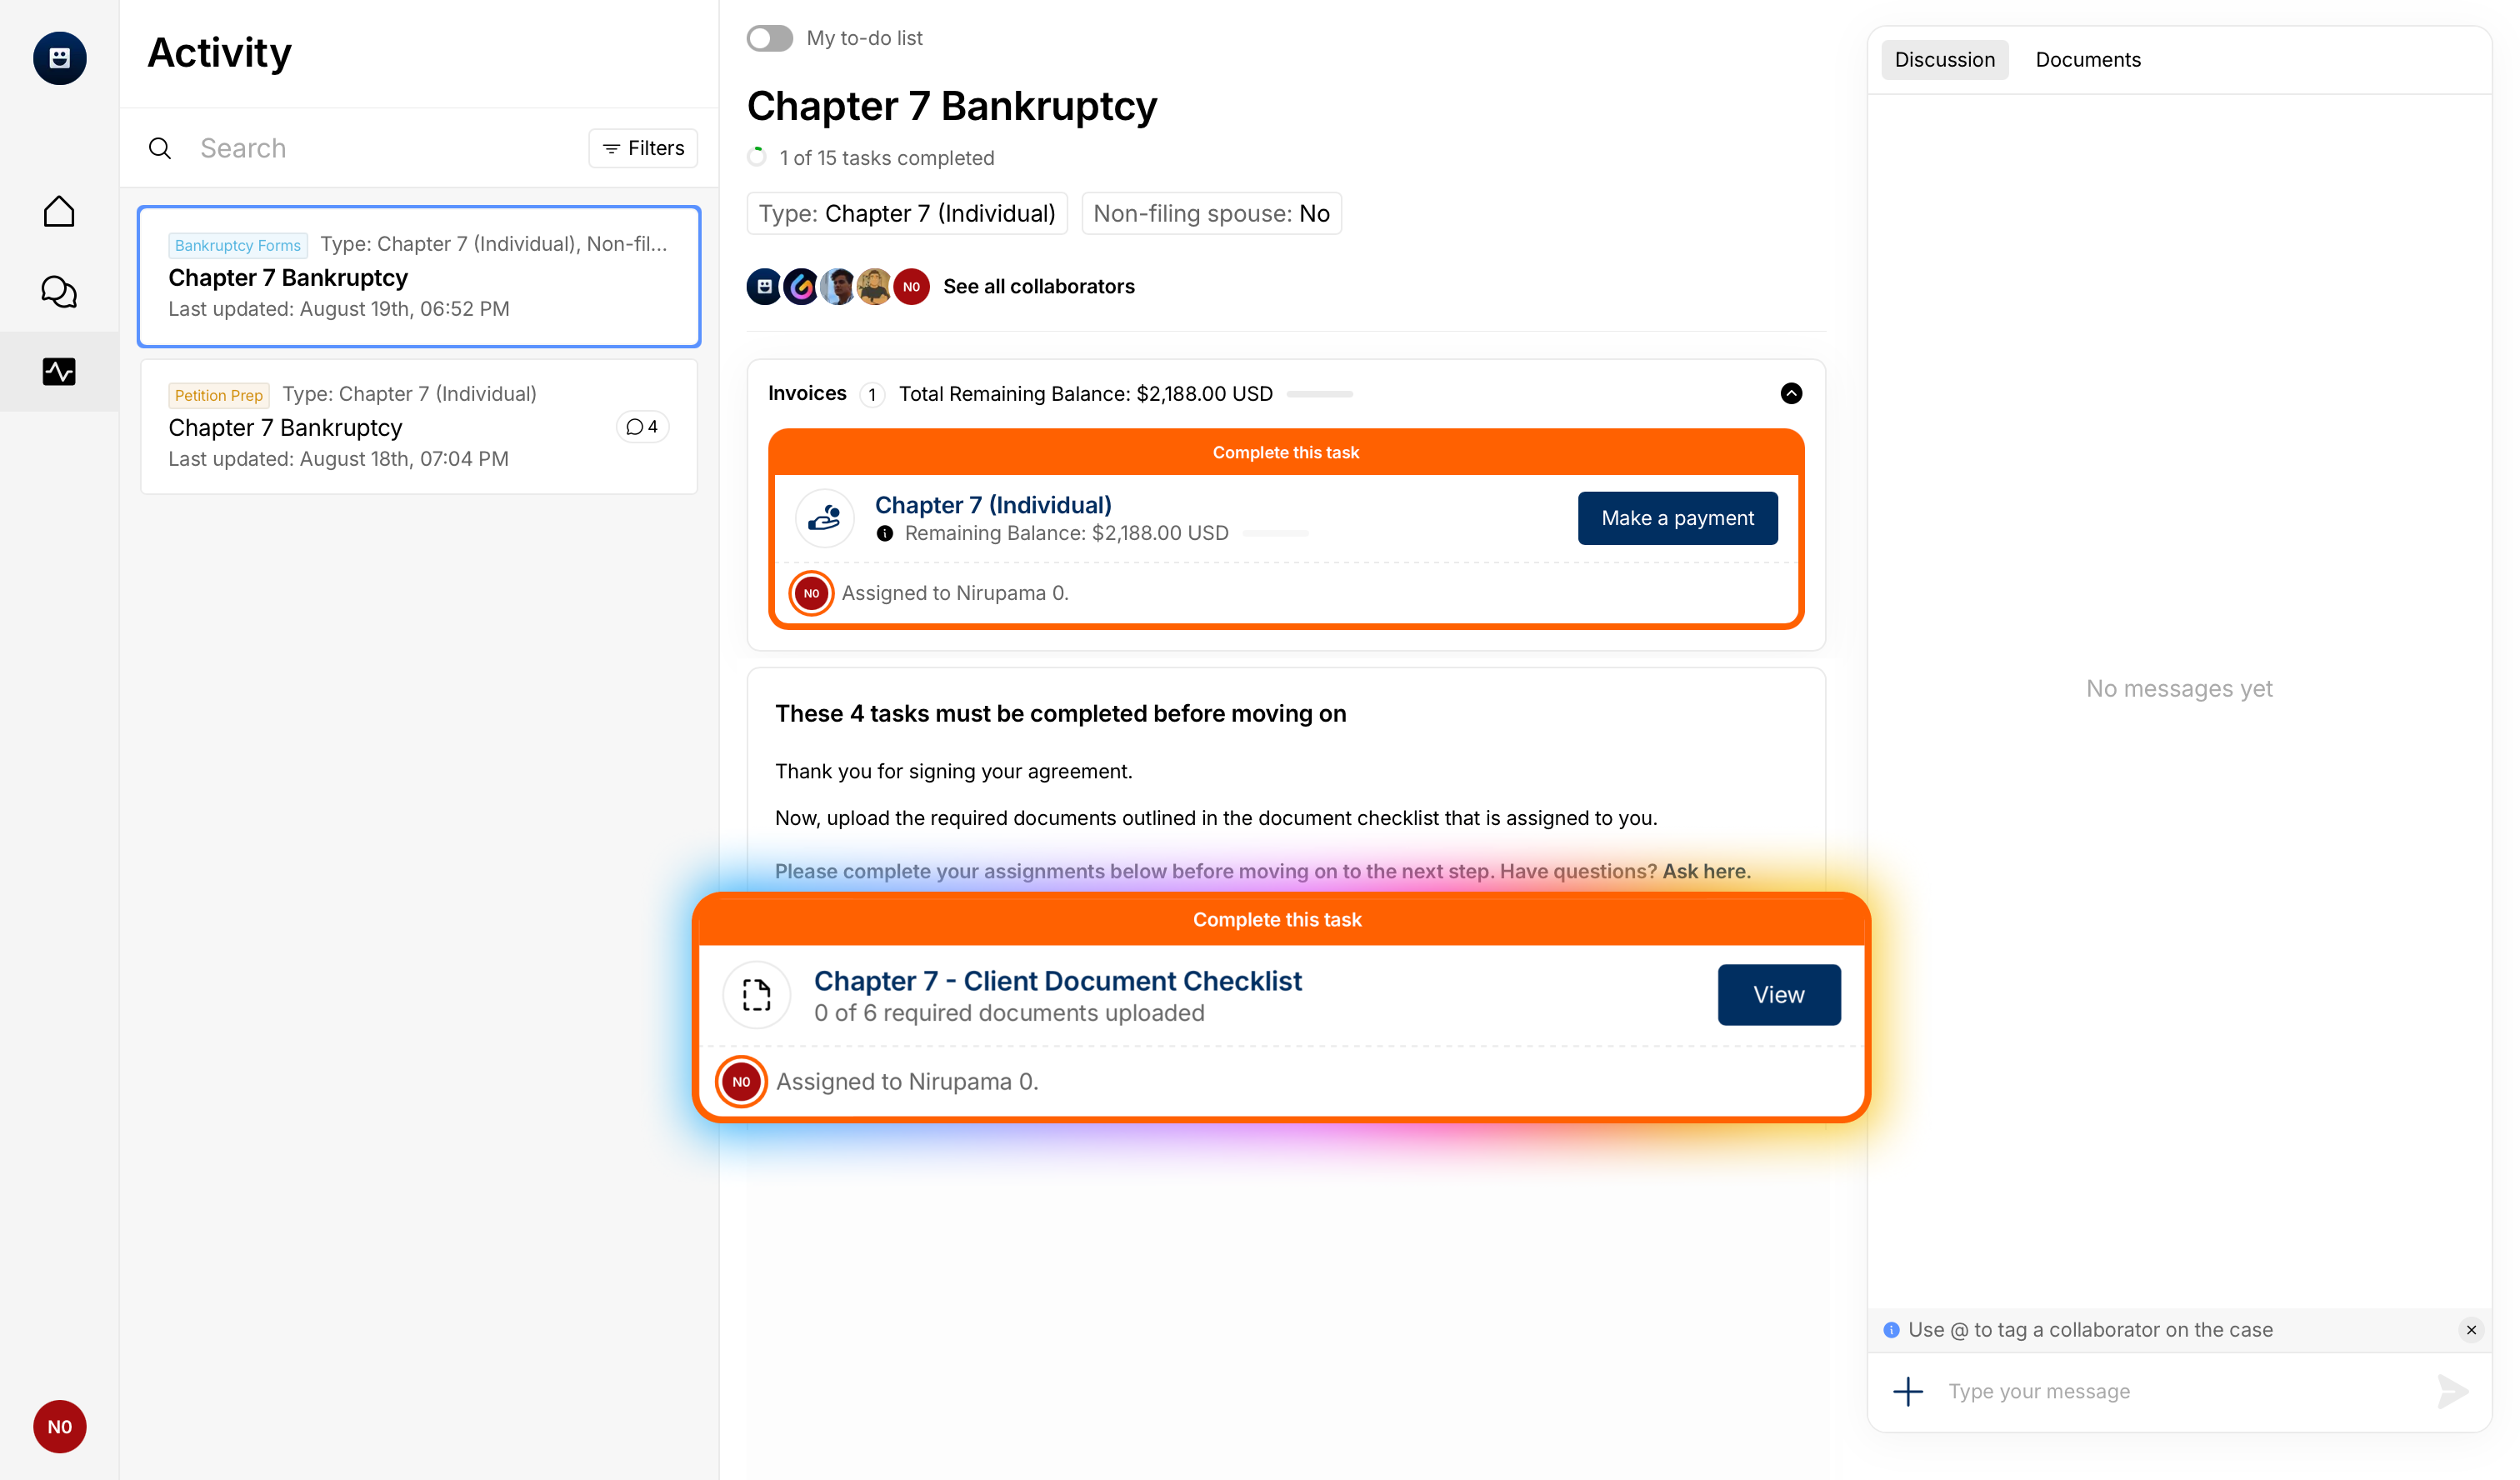
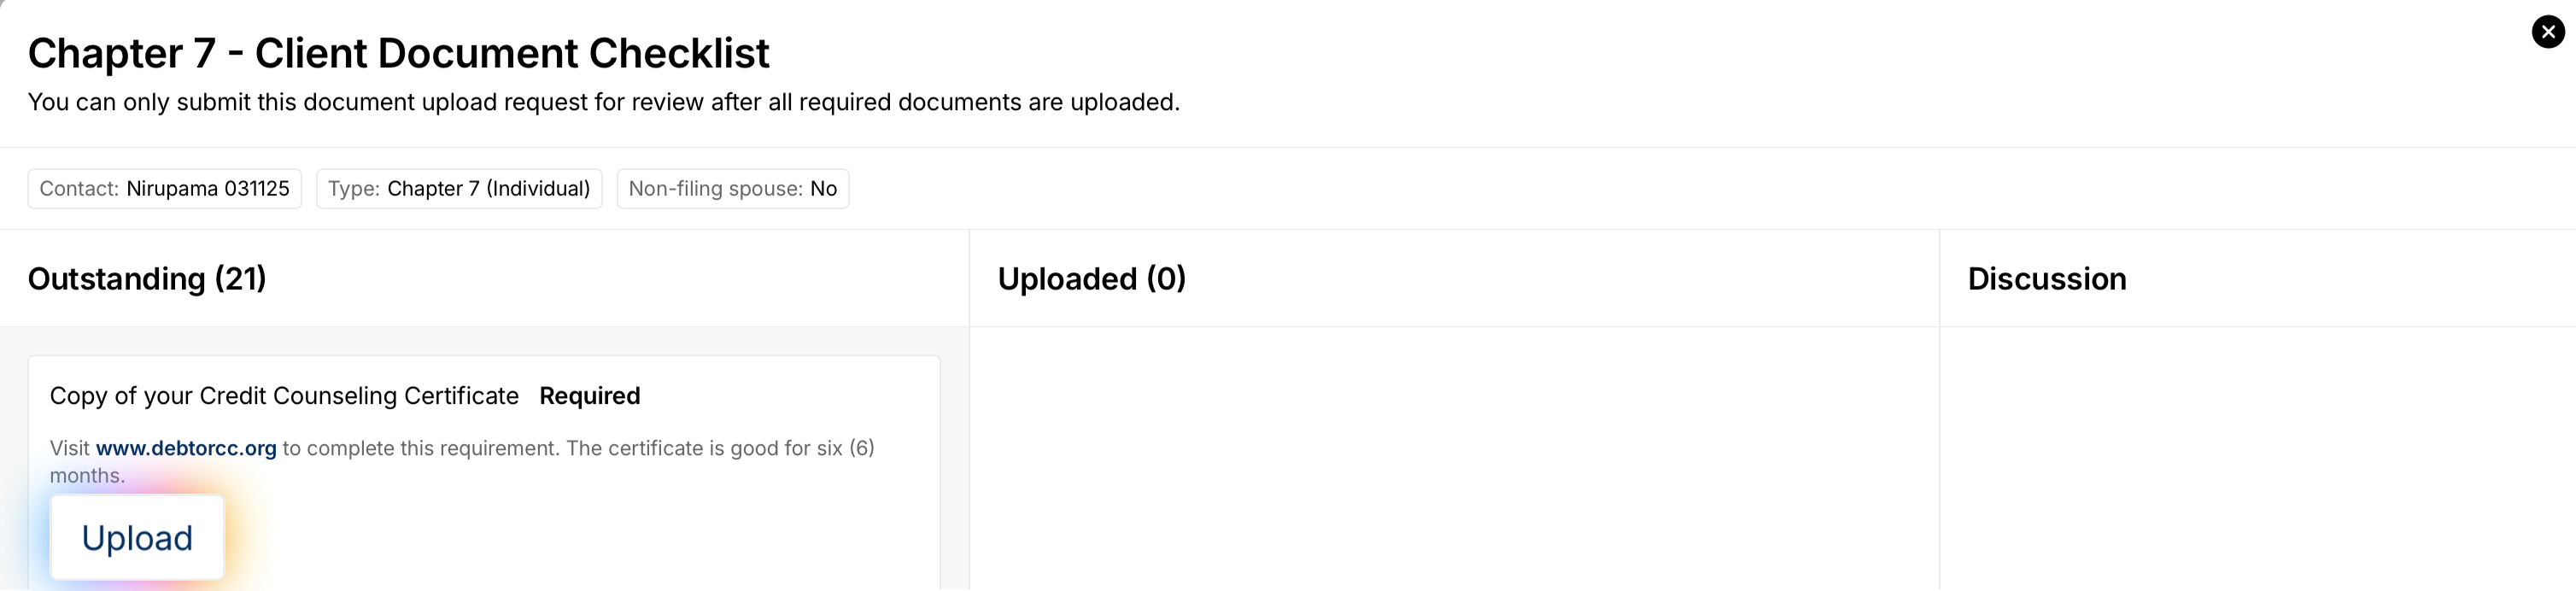
Upload your files
In Document Checklist, you’ll see the list of requested items.
Required items are clearly marked and must be uploaded.
Items labeled If available are optional but helpful.
[screenshot: Checklist with Required and If available labels]
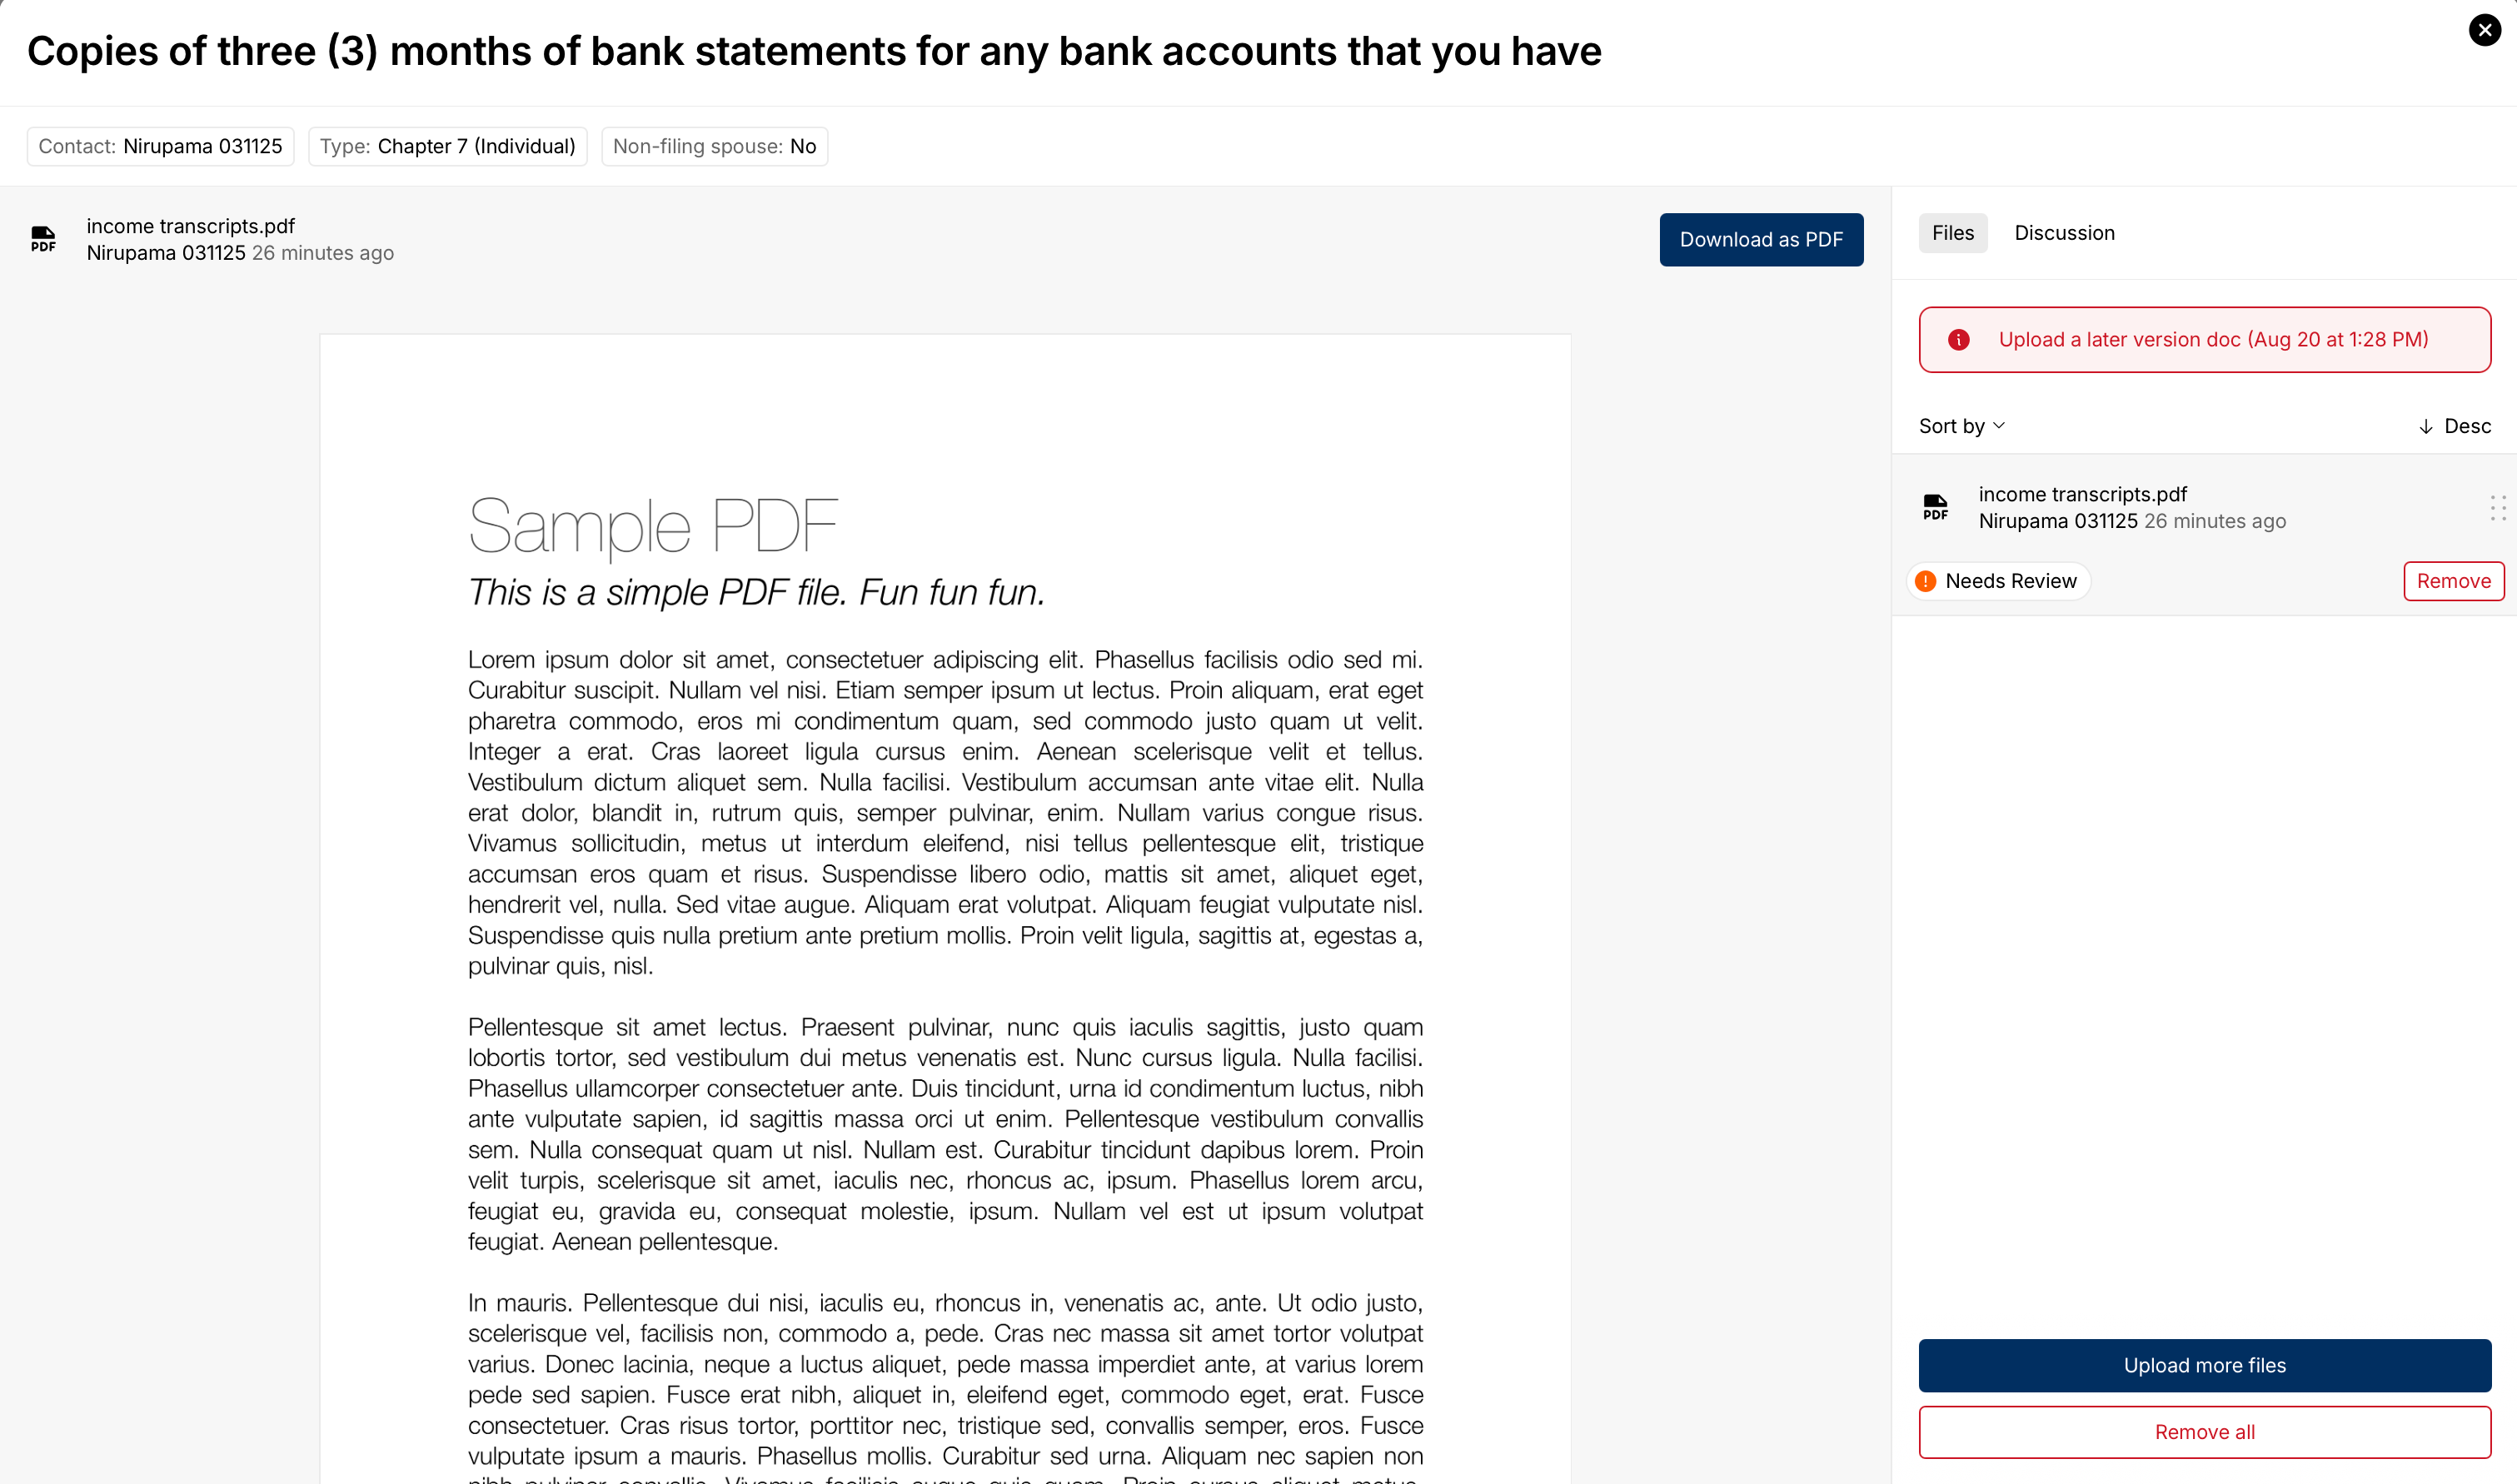
To add a file, click Upload next to the checklist item and choose your file.
After upload, the file will appear on the right side of the screen.
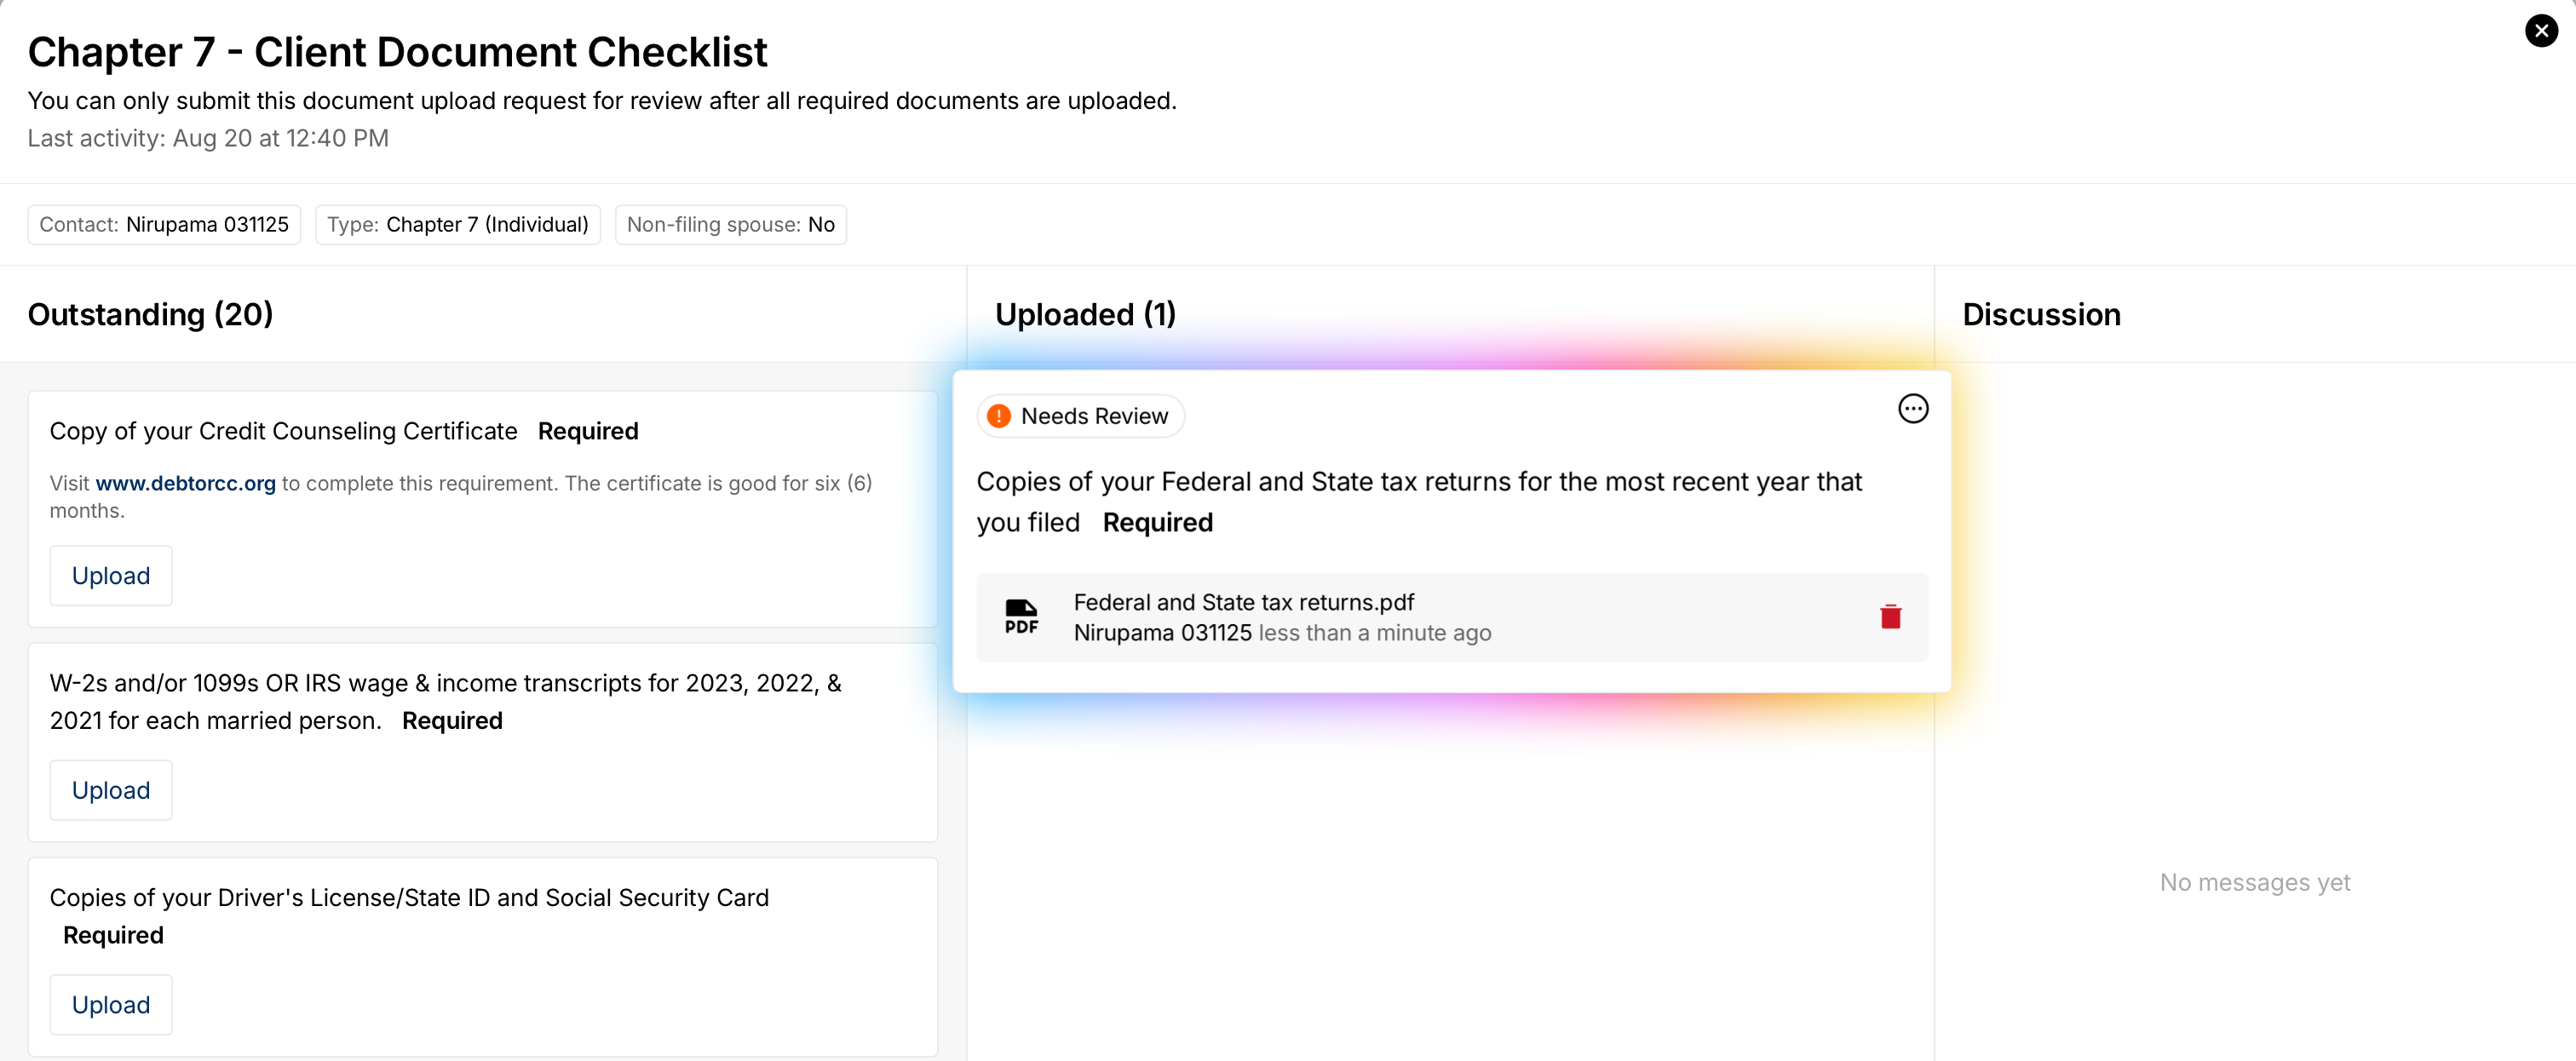
Need to attach more than one file to the same item? Click the three dots (⋯) and choose Upload More.

Submit for review
When you’ve added all Required documents, a modal will pop up asking if you want to submit or continue uploading. Once you are finished, click Submit for review.

Result: Your documents are sent to your legal team for review.
If a document is rejected and you want to re-upload
You’ll receive an email notification with the reason in the subject/message. Click View message to be redirected to the client portal.
This will open your Chat tab; follow the link there to return to the Document Checklist item that needs attention.
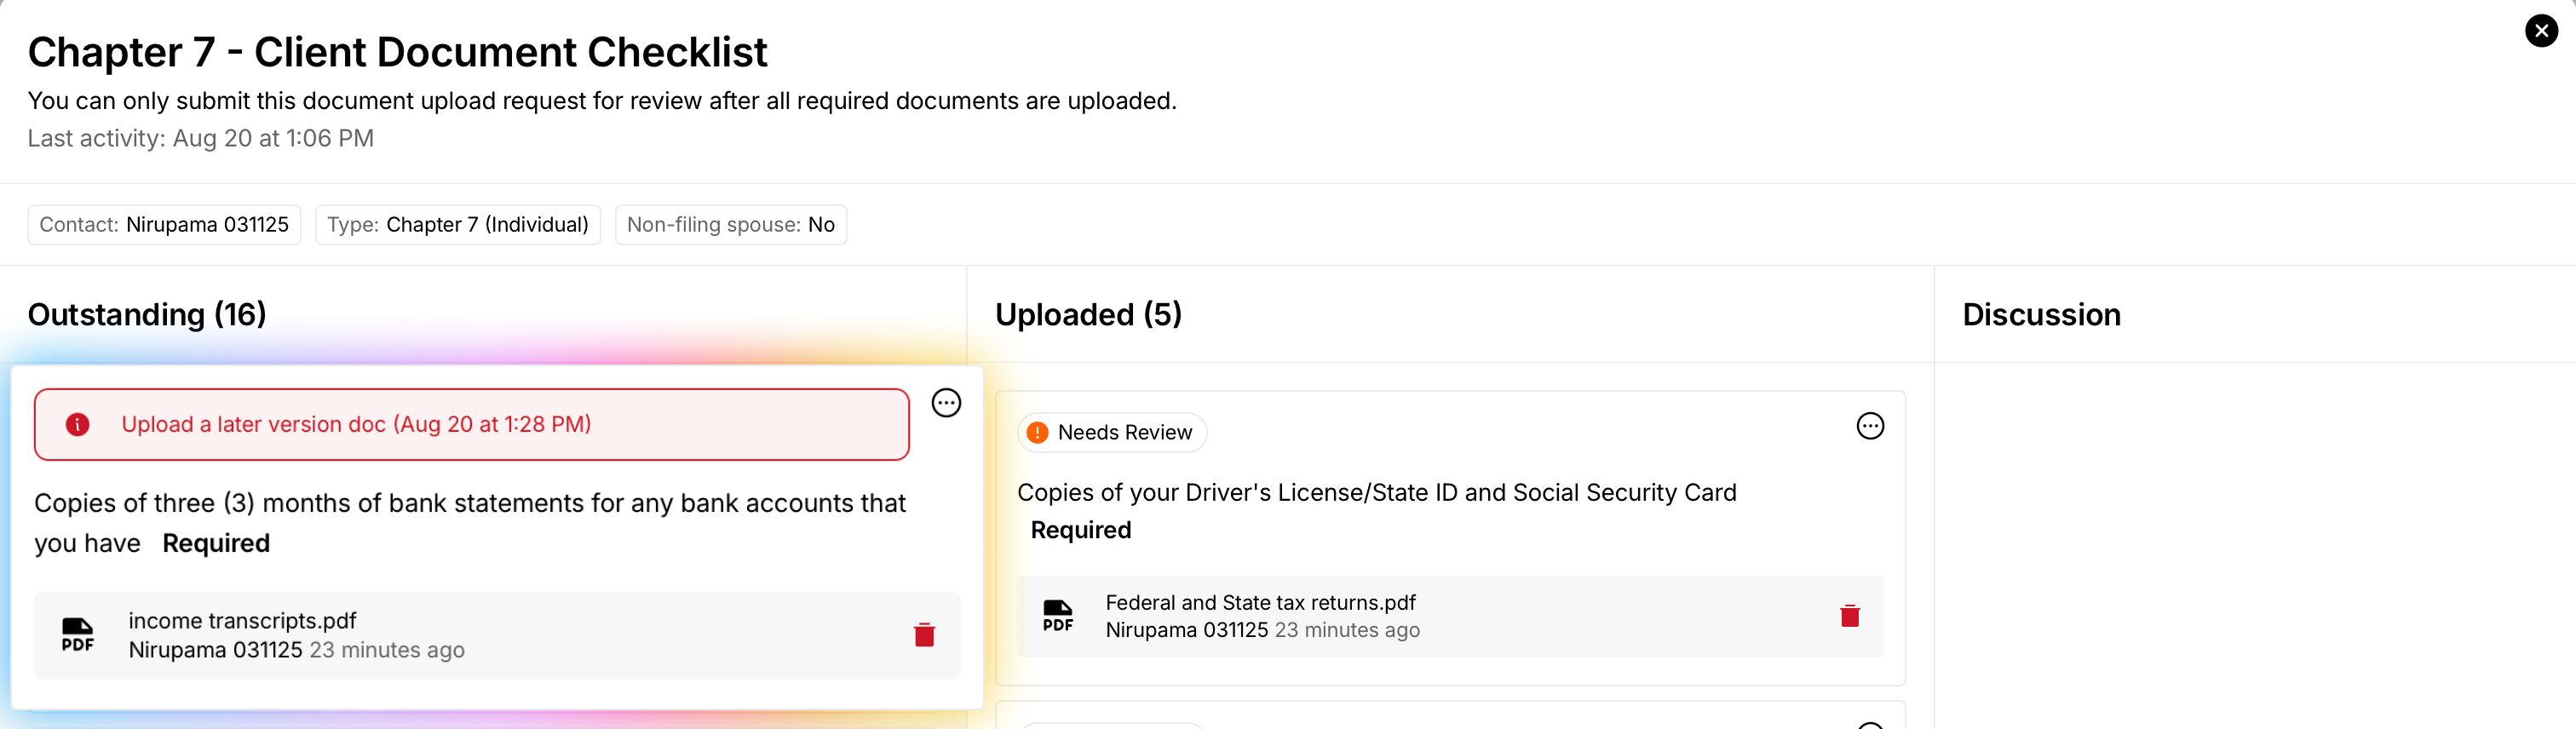
You may need to remove the incorrect file and upload more files, then resubmit for review.
Tips
If a PDF is locked (password‑protected), you’ll see a “file is locked” error. Request an unlocked version or use a trusted PDF tool to remove the password before uploading.
Combine multiple images into a single PDF when possible for faster review.
Use clear file names (e.g.,
ID_front.pdf,BankStatement_Mar2025.pdf).
Troubleshooting
Can’t see “Upload Documents” on Home: Refresh the page or go to Activity → Workflow → Document Checklist and click View.
Upload failed: Ensure the file type is PDF/JPEG/PNG and the PDF isn’t password‑protected. Try re‑saving and uploading again.
“Upload More” missing: Click the (⋯) menu for the checklist item and select Upload More.
Wrong file attached: Use the (⋯) menu to Remove and re‑upload the correct file.
Need help?
Email support@glade.ai and our team will assist you.