
How to add an Invoice to an Active workflow
Adding an invoice directly from a Workflow keeps billing in sync with your case work, triggers the right client notifications, and helps payments arrive on time.
Who this is for: Firm staff managing billing inside a client Workflow in Glade.
Before you start
Confirm which invoice template you’ll use (e.g., Chapter 7).
Verify the recipient (client or collaborator) who should receive the invoice.
Steps
Open the client’s Workflow.
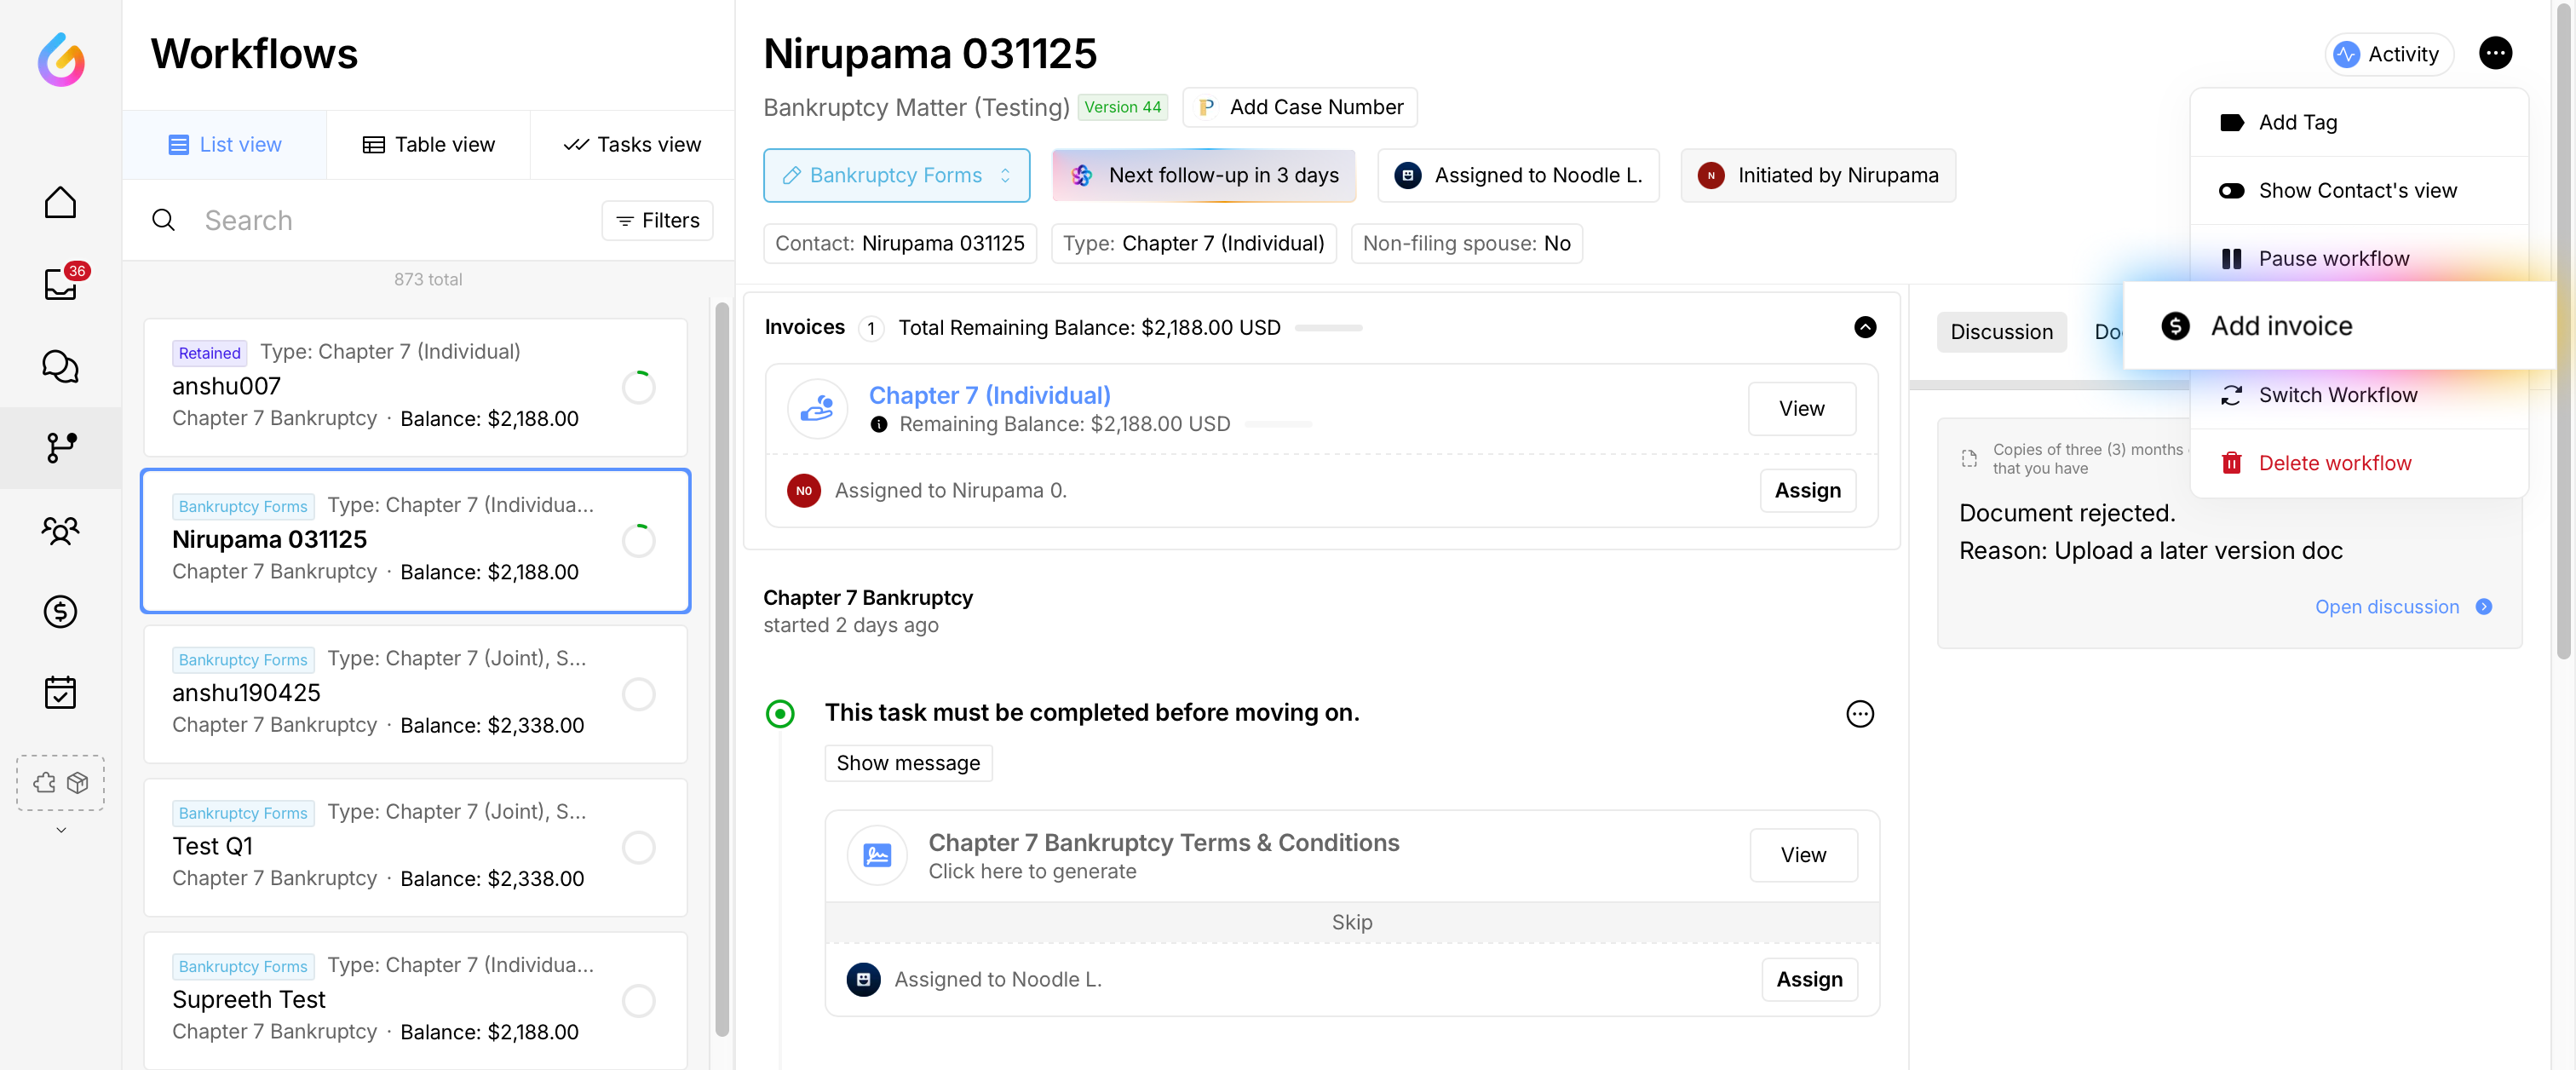
Click the three dots (⋯) in the top‑right and choose Add invoice.
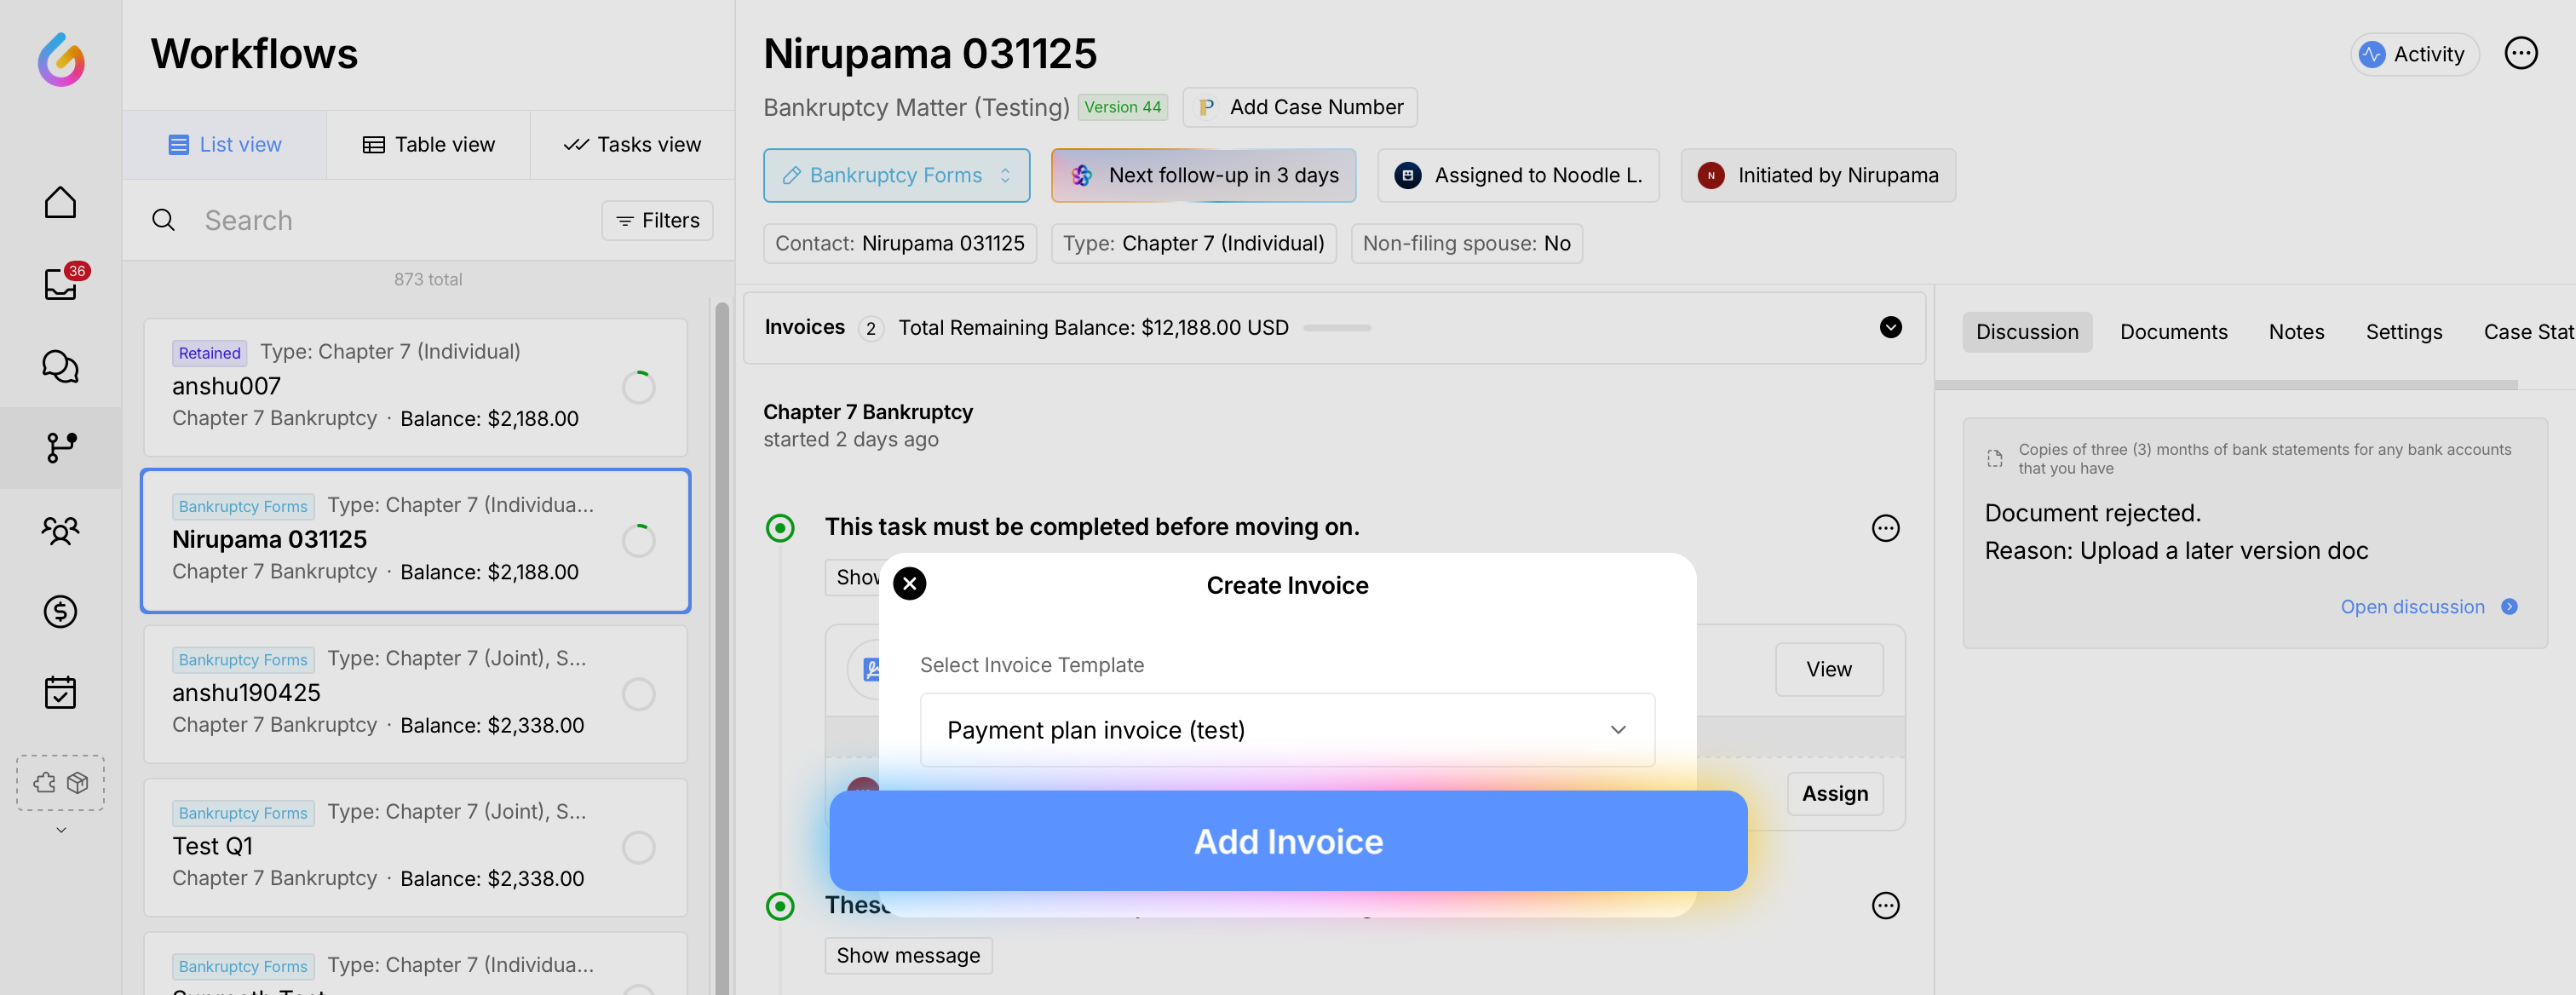
Select the invoice template (e.g., Chapter 7), then click Add invoice.
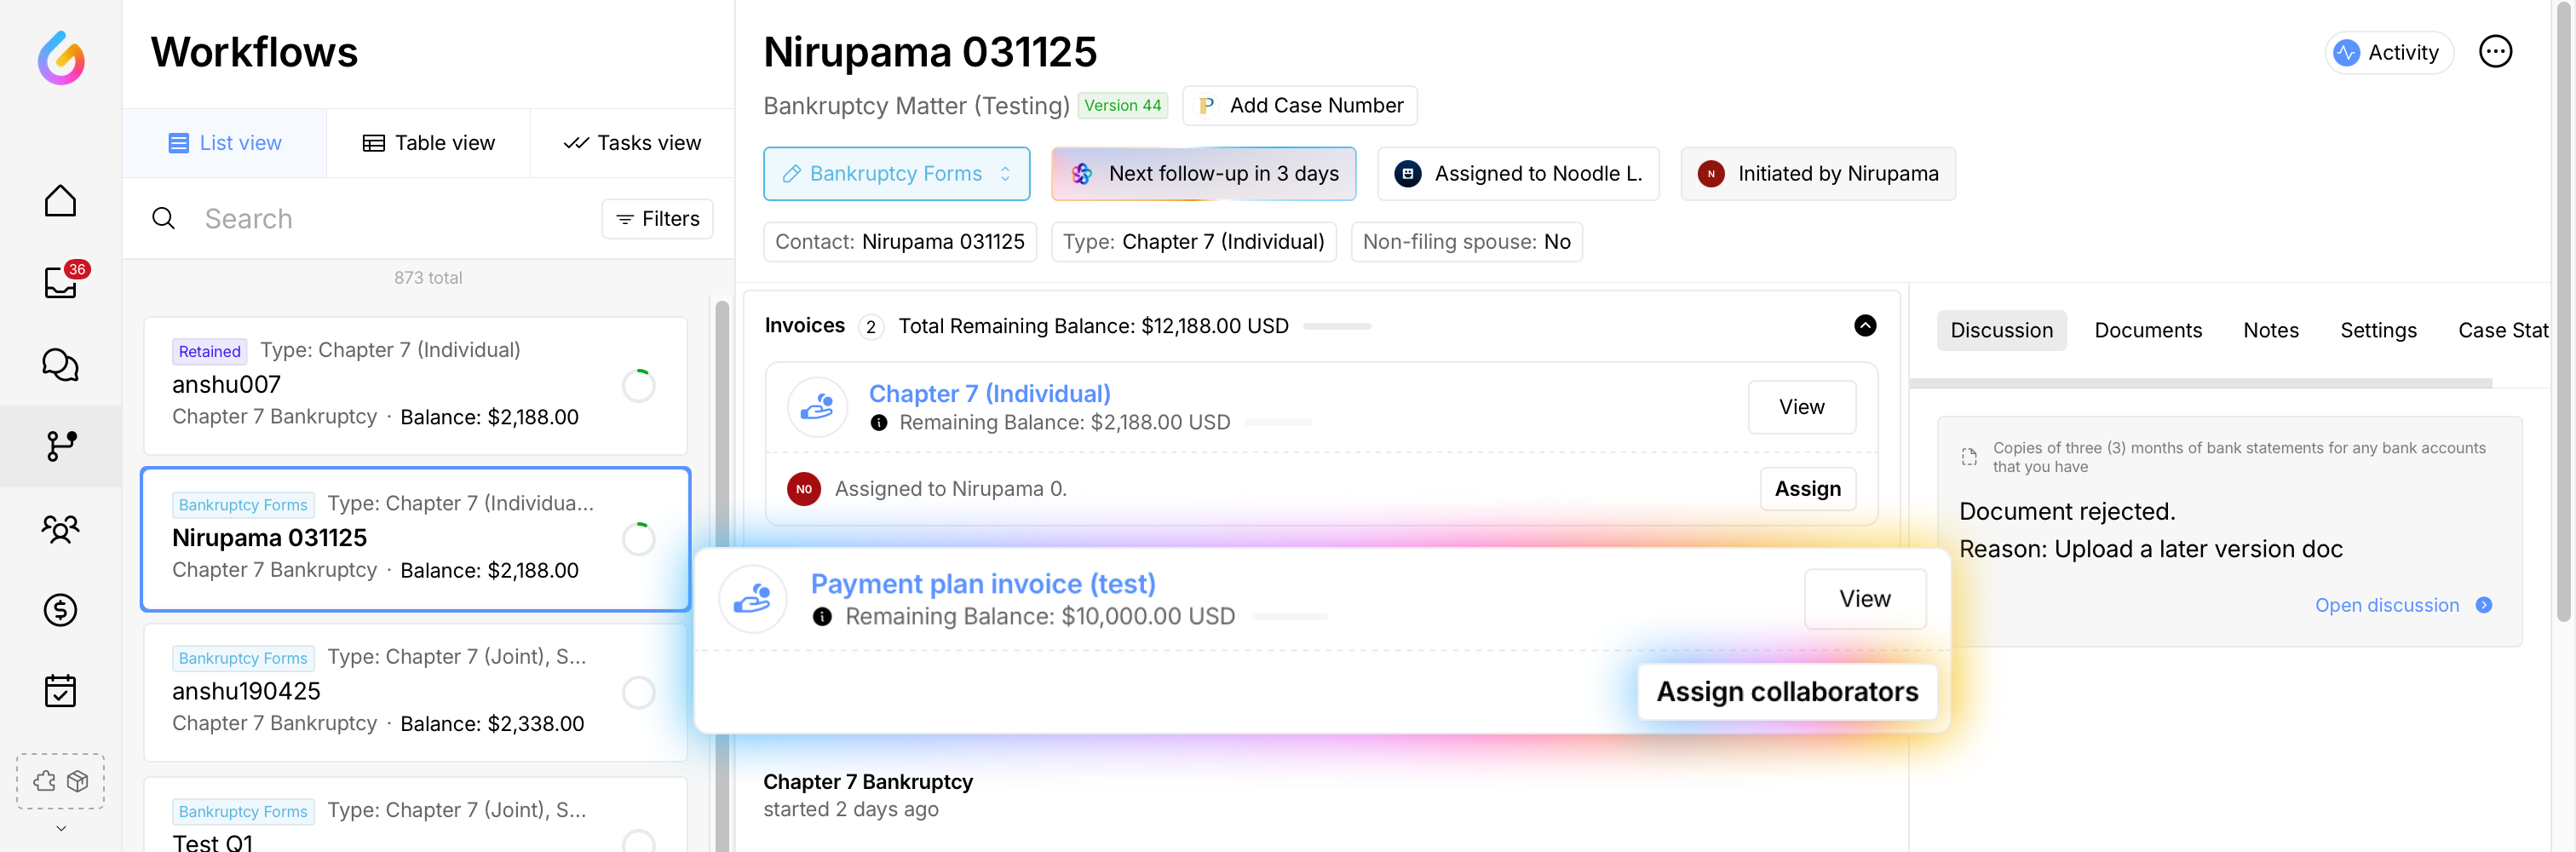
When the invoice loads (you’ll see it at the top of the page), open the dropdown and assign the Collaborator or Client. Click Save.
Result: The invoice is created and assigned. You’ll see the client’s name on the invoice, and the client will receive an email with payment details.
Tips
Double‑check amounts, descriptions, and due date before you save.
Make sure the recipient’s email is correct so notifications are delivered.
If you use tax or fees, verify these settings in the template prior to adding the invoice.
Troubleshooting
Don’t see “Add invoice”? Ensure you’re in an active Workflow and have permission to create invoices. Refresh the page and try again.
Client didn’t get the email: Confirm the invoice is assigned to the correct person and ask them to check spam/junk.
Wrong template selected: Delete/cancel the draft and add a new invoice with the correct template.
Need help?
Email support@glade.ai and our team will assist you.